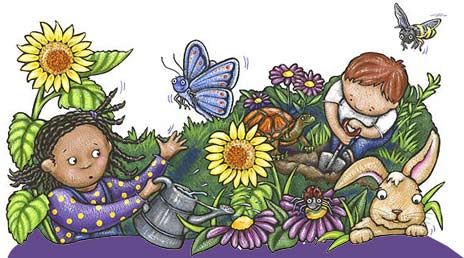
Salad Garden
Supplies:
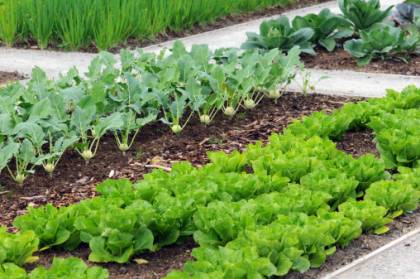
Prepared, raised
garden bed rich with compost
Salad green seeds and
starts
Scrounge for a tomato
cage and old nylons as ties
Liquid fertilizer,
such as Miracle Gro, and watering can
Scissors to cut greens
about an inch above ground
How
about growing some "living lunch"? Kids love a colorful, fast-growing salad
garden. The greens delight the five senses, and even a small space can provide
big dividends in appreciating for healthy eating. Here's a simple plan for a 4'
x 4' raised bed. You can pick and choose which plants to include, but here are
some good suggestions:
http://www.veggiegardener.com/create-fresh-salad-garden/
You can easily grow
spinach from seed starting at the tail end of winter, as long as the ground has
thawed fairly much. Follow seed packet directions for planting and spacing
directions. Be sure to add a bag of compost where you are planting spinach
seeds, as they love rich soil. Plan to fertilize, according to seed packet
directions - so keep your seed packet in your garden notebook for future
reference. Spinach won't grow very well once it gets hot, in June, so try to
plant seed early and eat it up before the blazing sun comes.
A couple of weeks
later, the ground is probably warm enough to add radish and lettuce seeds. Look
for a lighter green seed for Buttercrisp. You might try growing some leaf
lettuce, and some that will form a head, although leaf lettuce is easier.
Again, keep your seed packet for future guidance. Lettuce can take a little
more heat than spinach can, but once you see tall shoots suddenly appear,
usually in late June, the lettuce has gone to seed, and won't taste as good any
more. Best to pull it out, and plant some more seed in August, to be harvested
in September when it starts getting cool again.
Parsley seeds also can
go in now. Notice packet directions for seed spacing. You can always save extra
seeds to plant another round in late summer.
Ask around, and there are probably gardeners who
would LOVE to give you a few transplants of chives.
You can go to any
garden center or even hardware store in early to late spring and obtain onion
"starts." These look like tiny onion bulbs. You can get yellow, white or red
onion starts. They are fun to plant in a row, two inches apart - and in a few
weeks, pull up every other one and eat it in its "green onion" stage, when the
white bulb part is small and skinny, and the greens are long. By pulling out
every other one, you leave more space for the remaining onions to grow fat. You
can harvest them at summer's end.
Around May 1, the
ground is probably warm enough for you to plant a pepper plant. It is a
warmth-loving plant, so there's no sense trying to get a jump start on it by
planting it any earlier. Keep a pepper plant watered daily and fertilized every
two weeks, and you should have a basket full of green peppers - which, if you
leave them in place, ripen and sweeten into a beautiful red color, which is fun
for the kids to see, too.
The most exciting plant for a salad garden is
probably the tomato plant. If your garden site is protected from harsh winds,
you can probably plant your tomato plant around May 1 and it won't suffer
frost-kill. But if you want to start it earlier, or have fears about frost, you
can make a fun little shelter by cutting out the bottom of a translucent,
gallon milk jug, and gently placing it over your plant so that the bottom edges
nestle solidly into the soil and won't blow away. This acts as a
mini-greenhouse for your tomato plant during cold nights. You can take it off,
and leave it off, once the night temperatures become more moderate in late May.
It might be best to put your tomato plant in the
center of the garden, possibly positioned to shade the spinach plants later and
keep them cool. You might consider a grape or cherry tomato plant, rather than
one that produces large, slicing tomatoes.
If someone in your group can supply a tall staking
cage, that would be helpful. You will need to anchor the cage deeply into the
ground so that the wind doesn't blow it over. You can use tent stakes for that
purpose.
Maybe someone would donate the tomato plant, as well.
It's probably best to buy a tomato plant at a garden center, that is already
started and has sturdy stalks and a good root system, rather than trying to
grow it from seed. If a parent and student go to a garden center for this
reason, it's a great idea to ask an employee for help in selecting a good
choice, and then that student can share the information with the other
students.
During summer break, students may enjoy visiting the
tomato plant every couple of weeks to watch the yellow blossoms appear,
followed shortly by green tomatoes that ripen into a rich, delicious red. As
your tomato grows up and out, your group can collect nylon hose with runs in
them to tie the stalks gently to the cage. It is also important that tomatoes
be watered daily, if it doesn't rain, and fertilized with a liquid product such
as Miracle Gro every two weeks. The more you pick ripe tomatoes, the more
you'll get, so assign someone to go and harvest regularly!
--------------------
While
you're waiting for your own greens to grow, you can make a quick trip to the
grocery store and fix this easy salad recipe with the kids. It will help teach
them what the different plants produce, what the food items look like when they
are ripe, and get them excited to prepare and eat their OWN salad when their
plants are ready to be harvested.
This
is a fun activity to do at the start of your club meeting, and, while it is
chilling, do something else. Then, before your session ends, wash hands, and
eat!
PASTA SALAD
one
package macaroni (16 oz)
two
cucumbers, peeled and diced
four
small or medium tomatoes, chopped
four
carrots, diced
one
head iceberg lettuce
two
tablespoons chopped fresh herbs (oregano or basil)
one
cup mayonnaise
small
bowls
large
serving bowl
optional:
grape tomatoes, several colors of leaf lettuce instead of iceberg, a sprinkling
of additional herbs, such as fresh parsley
1. Take time to touch and smell the different vegetables
and herbs and note their differences and or similarities. Talk about how each
is grown tomatoes grow on a vine, carrots grow beneath the soil, etc.
2. Prepare the ingredients as described above. Place
each in a separate small bowl.
3. In a large pot of salted boiling water, cook pasta,
rinse under cold water, and drain. Add to a large serving bowl.
4. Invite children to combine the diced cucumbers,
chopped tomatoes, diced carrots, herbs, and mayonnaise with the pasta. Mix
well.
5. Place the salad in the refrigerator to chill for at
least a half hour. In the meantime encourage your child to select large, crisp
leaves of lettuce to place in the center of salad plates.
6. Once the pasta mixture has chilled, scoop and serve
on top of the lettuce.