
Newspaper Pots
Supplies:
Newspaper single
pages | scissors | 2" masking tape or duct tape
A cylindrical mold
(margarine tub, drinking cup or a large can)
Waxed paper | potting
soil | rubber gloves | rooting compound (optional)
Naturally, gardeners like to be
"green." Here's a fun way to create biodegradable plant pots, save money, and
save the environment. We'll use old newspapers, instead of plastic pots, since
many of the thin plastic pots used to sell plants can't easily be recycled.
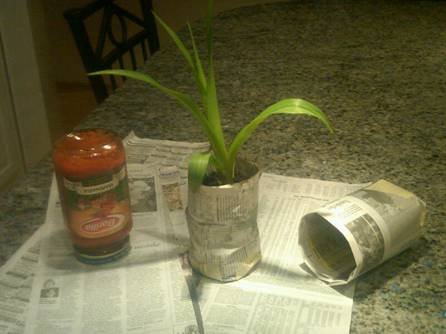
For medium-size pots, we used a jar of spaghetti sauce
as the "mold" for the newspaper. That's a day lily
divided from an overgrown clump of day lilies
that a kids' garden club is going to sell for $1 at the school
carnival.
Of course you subscribe to the
newspaper, don't you? You should! And not just for the articles: newspaper is a
fantastic recyclable material for gardening. After all, it comes from trees.
That's where paper comes from. And since trees naturally decompose back into
soil, so do newspapers.
In the olden days, you couldn't make
newspaper pots, because there were heavy metals stirred into newspaper inks or
used in the papermaking process. They could contaminate the soil where your
plants would grow. But not any more! Now most newspaper and inks are made from
organic materials, such as soybeans for inks. So you're good to go.
Why do we even NEED newspaper pots?
Well, if you have already started plants from seed in those small "cells" in
flats, they tend to grow quickly, and may need to be transplanted into a larger
container for a few weeks before they can be planted in their final home
outside. Newspaper pots are only a temporary home, but if you can make them for
little or no cost, it's a great cost-savings.
The
time to transplant a new seedling into its second, larger home is when the
plant has gotten its second set of true leaves. The first tiny leaves that pop
up after germination aren't really leaves - they are called "cotyledons" - kot
tle EE dins - and they provide food for the little plant embryo that emerges
from the seed.
After two more sets of larger leaves
appear, you may choose to transplant each plant into a larger pot - made of
newspaper!
Then you can either rip off the tape
and plant the pot, newsprint and all, into the soil, or dump the soil ball out
of the newspaper pot at planting time, and recycle the newspaper for use
another way.
Here's
how to make newspaper pots:
1. Lay out single sheets of newspaper, or cut them in halves
or thirds, depending on the size of pot you want to make. Decide on your pot
size based on what plants you are going to put in the pots. A garden club that
is potting up larger perennials, such as iris or peonies, that have some pretty
big roots, might want a 5" to 6" wide newspaper pot formed around a large can
of beans or family-size soup can. But a club starting tiny seeds of vegetables
or flowers might use a plastic cup or jelly jar that is only 2" or 3" across.
Maybe you'll make two or three different sizes and have some choices at
transplanting time.
- Lay
out a piece of waxed paper, and cut several strips of masking tape into
strips a couple of inches longer than your pot bottom. By laying out the
strips of tape in advance, it will make it easier for you to get the tape
on your "pot" while holding the pot together with one hand.
- Now
roll your first pot! Roll it around your jar or glass as straight and snug
as you can. It's good if a few inches of newsprint hang over the bottom of
your jar. They will form the bottom of your pot.
- Place
the cylinder that you've made on the table, and with your hands, fold four
"flaps" down toward the middle from the left, right, up and down sides.
There's your pot bottom!
- While
holding the bottom down with one hand, grab a strip of masking tape. Lay
it over the folds. Press down. Now take a second piece of tape, and lay it
over the folds in another direction, to make a cross of tape. That's a
secure bottom!
- Wearing
rubber gloves to protect your skin from infection, moisten potting soil
with a little lukewarm water, and plant your living plant or seeds
according to planting directions. Water in with additional lukewarm water,
but don't get it too wet.
- Keep
your newspaper pots in a plastic tray or on pavement so that you can water
them until it's time to plant them in your garden, or sell them for a
profit! The newspaper will hold up for weeks, but your plants will
probably be happier in the ground or a permanent pot for most of the
growing season.
|
|