
Radishes
Kids' gardening starts with
radishes. The seeds are cheap, easy and fun to grow. Harvest is fast, too -
usually less than a month after planting the seeds.
You can start radish seeds outside
any time in April or May, and they'll turn out great. They don't like the
really hot weather so much, but you can start new seeds in August or even
mid-September and you're likely to get a delicious fall crop as well, and beat
the frost.
Keep them moist, write down the
expected harvest date in your garden calendar (use the seed packet
instructions), and watch your radish patch carefully for telltale glimpses of
red when it's close to harvest time. You'll be rewarded with this tasty,
nutrient-packed little veggie.
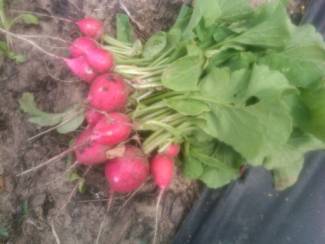
The young gardener squeaked
when she pulled up these radishes from the soil!
Facts about
radish care:
1. Radish roots may grow 6 or 8 inches
deep, even though the radish itself rests near the surface. So it's a great
idea to dig a foot deep and loosen up the soil really well, adding compost or
rotted manure to enrich it.
2. Radishes are great to plant next to
beans, carrots, cucumbers, lettuce, peas and squash. They act as "soldier"
crops that attract harmful bugs first, before they can get to those other
crops. Then you can either dispose of the harmful bugs, or throw away infested
radish plants, since they are very cheap compared to the plants the radishes
are protecting.
3. Since you can plant radishes very early
in the spring and they're ready to be harvested right when summer growers are
ready to be planted, they make great use of space by double-planting. Once you
harvest the radishes, you can immediately re-use the same soil by planting
beans. Then when the beans are almost done bearing in the late summer, plant
radish seeds again! By the time you're throwing away the dead bean stalks, the
radishes will be growing and using that space again.
4. Since radish seeds are so tiny, you
might want to mix them with a cup of sand so that you can pour out a row of the
sand-seed mixture and expect the seeds not to get too clumped together, or blow
away from your hand.
5. Use your stiff garden rake to rake
the prepared seedbed in a straight line and make shallow canals, or furrows.
Then you can follow the line that the tines of the rake - the sharp points -
make as furrows to pour out your sand-seed mixture. Or use a ruler or a
yardstick to make straight lines.
6. Pour out radish seeds in rows that
are 3" to 6" apart.
7. With your hands, brush about ¼" very
fine soil over the radish seeds.
8. With a sprinkling can or misting
hose attachment, keep the soil moist with a daily sprinkle every day 'til the
little green tops peek up. Don't allow standing water, and don't let it be
soggy - just moist about an inch down, to encourage the plant to root and
sprout. Water needs after sprouting relax a bit; then you can sprinkle every
other day or so.
9. When radishes are about 2" tall, you
might need to remove some of the baby plants. Thin by pulling extra ones out,
or even by cutting them off at the soil line with small scissors, so that you
don't disturb the other radishes. Shoot for ending up with radishes all
standing about 2" away from any other radish. Yes, you're wasting seedlings by
thinning, but it's better to ensure each radish enough space, and seeds are
cheap!

Ready to be pulled up.
10. It's better to harvest radishes a little early than wait too late.
They tend to crack open if they are overripe, and then critters get inside.
Eww! As soon as you can see a lot of red in the patch, pull one or two out by
grasping the leaves. If they're big enough, pull a bunch out. You may go back
two or three more times in the next week to harvest them all. You can rinse and
eat the leaves as a salad, though they taste kind of grass-y. If you aren't
going to eat the radishes right away, that's fine. Cut the stems to one inch,
and put the radishes, dirt and all, in the fridge 'til you're ready to rinse
them, cut off the stem end and root end, and eat. They keep better in the
fridge than outside in the hot sun! They should keep for a week in the fridge. Here's
a good recipe kids enjoy because of the sweet fruit juices:
http://gardening.afterschooltreats.com/wfdata/frame153-1003/pressrel5.asp


